This tool allows you to create a custom event space in any location! Select a setting (beach, backyard, ballroom, etc.) or create a structure from scratch using our blueprint tracing tool. Once complete, you can design the space in 3D.
What is the Custom Space tool?
The Custom Space tool allows you to create your own indoor room or outdoor space which you can immediately use to design your event in 2D and 3D. With this tool, you have the flexibility to make your Custom Space as simple or as detailed as desired.
When would you use the Custom Space tool?
Here are some scenarios where you might consider using the Custom Space tool:
- If you need to design a tented event or the event is at a private residence
- If you just need to create a quick layout in an empty space and you don’t need a detailed 3D model
- If you need to create a design immediately and it's not possible to wait 3 business days for our team to create it for you
⚠️Please note: If you create a Custom Space and later decide to change your venue to one requested from our team, only your Vision Board will transfer over. Any layouts created in your Custom Space will be lost.
How to Create a Custom Space
1. Create a New Event
To access the Custom Space tool, begin by creating a new event in the Events Dashboard.
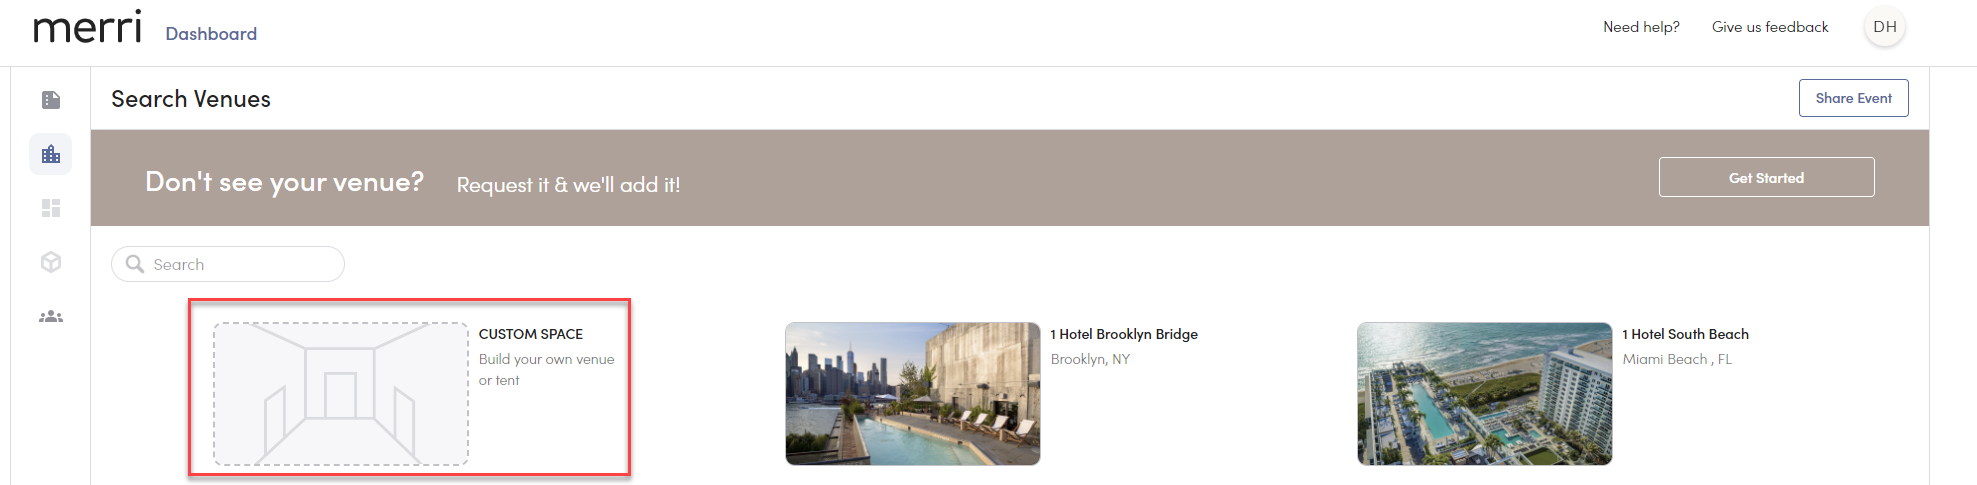
2. Select "Custom Space" as your venue
Regardless of the location you enter, Custom Space will always be the first choice.
3. Choose how you'd like to start your project
Once you have selected Custom Space, you have three options:
- We give you one more chance to submit a venue request to our team 😊
- Build your venue from scratch
- Move forward with a sample 100'x100' space (this is the quickest way to get to designing and will take you directly to the Vision Board to select your initial set of furniture and décor)

4. Choose your venue setting
Here you have the option to choose between an indoor or outdoor setting.
⭐ If you are planning a tented event, it is necessary to select an outdoor setting.
The setting you choose will determine the default ground texture placed on your outdoor space, such as grass for the field and sand for the beach. If you choose an indoor setting, default wall, floor, and ceiling textures will be pre-selected.
⭐ Select "No Setting" when you truly want to start from scratch in grayscale and hand-pick each texture in the Venue Builder.

How to Build a Venue From Scratch
📽️Watch this video for a comprehensive walkthrough of the Custom Space Venue Builder (8 mins). If you prefer, there are step-by-step written instructions below.
After you select "Build Your Venue" and choose your venue setting, you will be brought to the Custom Space Venue Builder.

You have three ways to build out your venue:
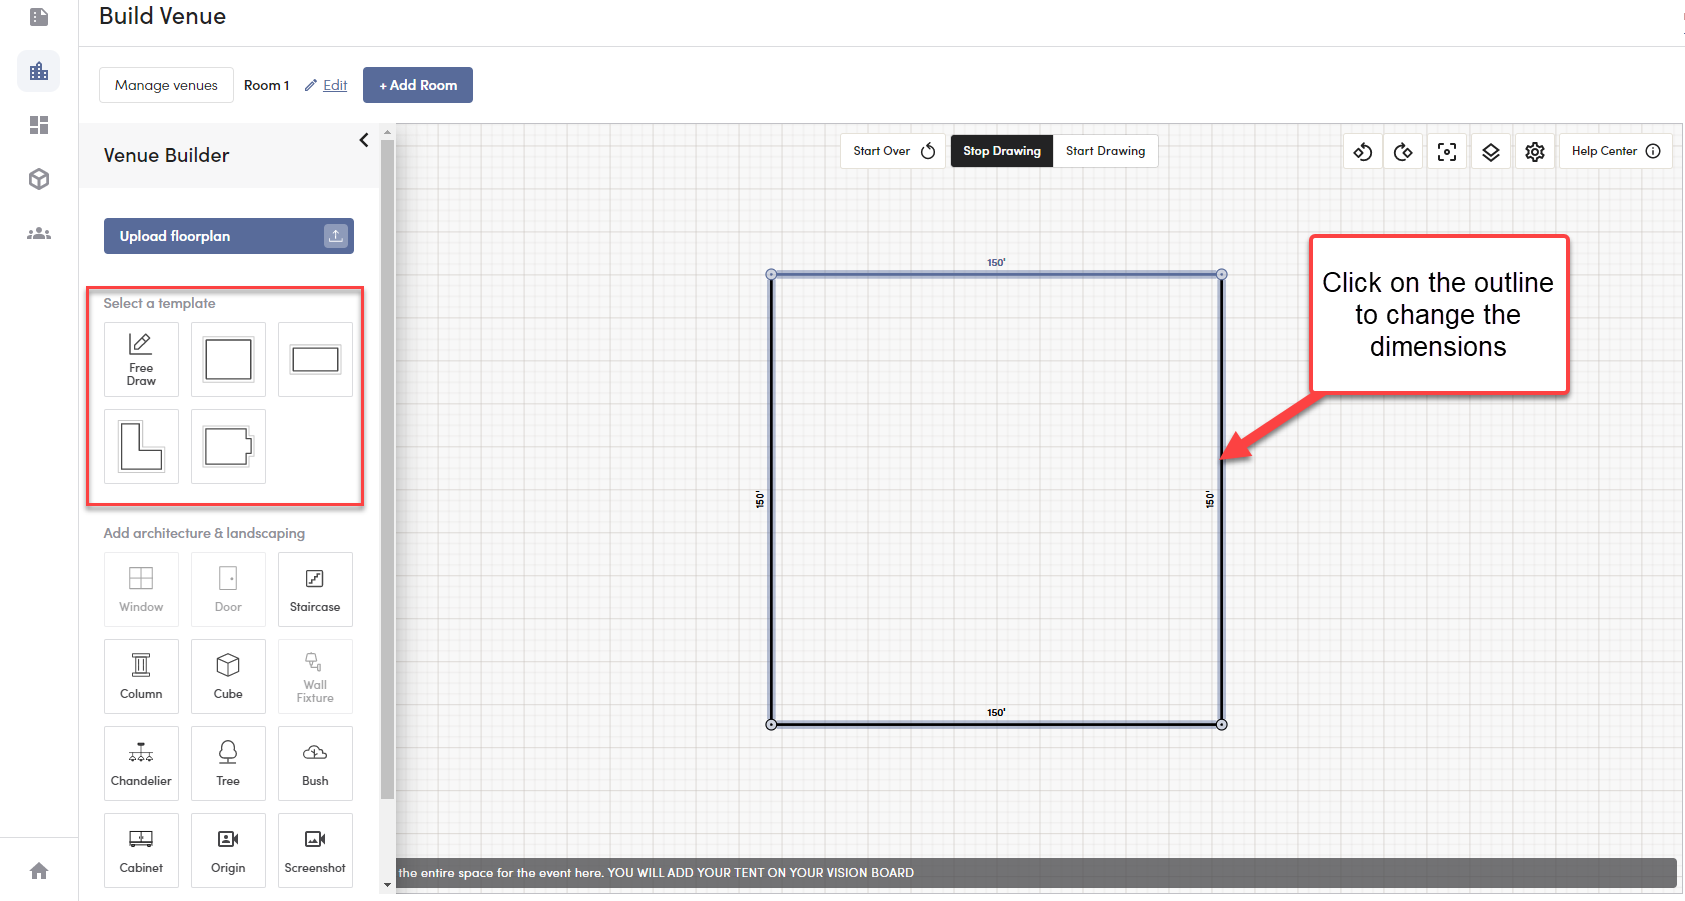
- Select a Template
Using a template is the easiest and quickest way to create a venue
- Upload a Floorplan
Use this option create your room or outdoor space by tracing a blueprint.
First, upload the floorplan > select "Start Drawing" > outline the entire space you need included. Once you've finished drawing, you can click the outline to change dimensions of individual segments.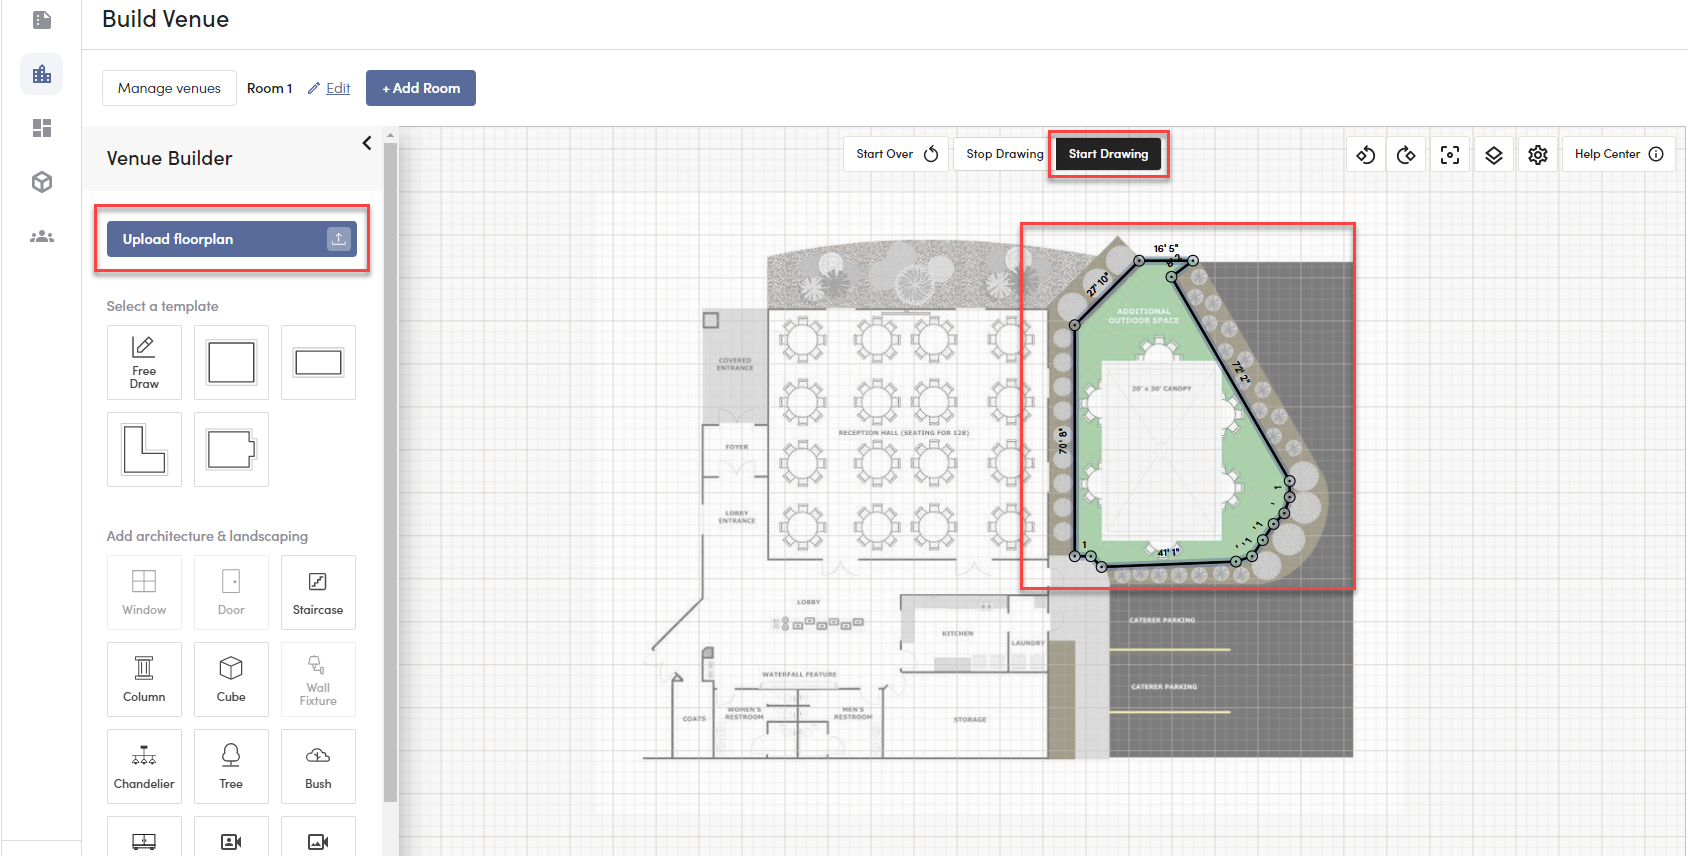
- Free Draw
Free Draw allows you to create our own space, any shape and dimensions you'd like.
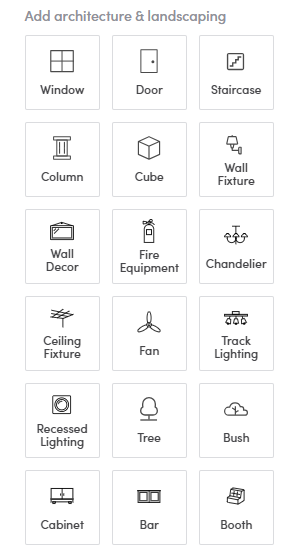
⭐Once your perimeter is complete, you have the ability to further customize your space with our various architecture and landscaping tools: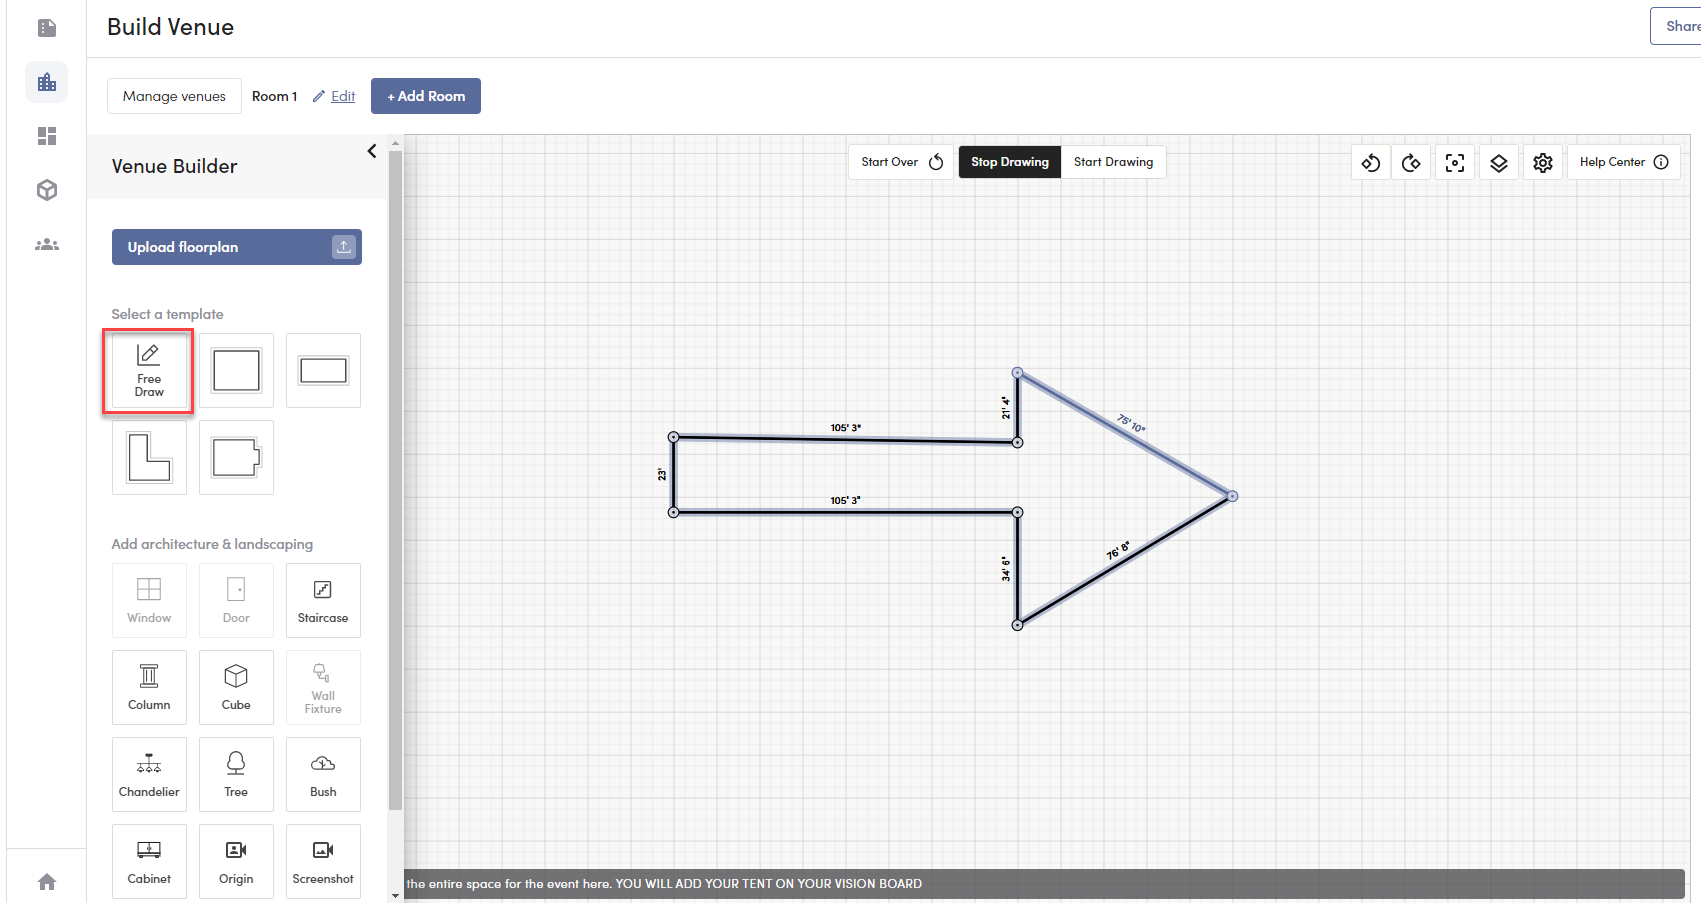
How to Edit Your Custom Space
To edit your Custom Space, click any line segment to bring up the toolbar.
1. Edit the Dimensions
Click a specific line segment to change its length or height.
⭐Pro Tip: When you use this method to change the length of a wall, it will set the scale of your space. This means all other wall dimensions will automatically change as they will follow that scale.
2. Change the Wall Type
3. Choose the Floor, Wall, or Ceiling Textures
You will see different options here depending on the setting & wall type you choose i.e. indoor or outdoor, building vs floor or fence.
5. Choose the Molding
If you selected an indoor setting you will be able to select the Crown and Baseboard molding.
⭐Once your Custom Space is complete click into the "Vision Board" to select your furniture and décor, or "View Your Space" to see how your Custom Space looks in 3D! 