Merri's Upload Item tool allows you to upload your own custom images to your Vision Board to use instantly within your 3D design.
Within the Vision Board, you have access to Merri's entire catalog of over 70,000 furniture and décor items. Even with all of those options, there may come times when you need to see a custom item such as a floral arrangement or tabletop item in your design. The Upload Item tool is a quick and easy way to upload these custom pieces directly to your Vision Board to then visualize within your 3D event. This article includes answers to some common questions and tips for uploading custom items.

What kind of items can I upload to use in 3D?
When you upload an item, you are essentially inserting a flat or 2D image into a 3D space. That being said, items that lay flat horizontally (like a menu or dance floor), stand flat vertically (a backdrop or divider), or look best head on (like floral arrangements), will look best in your 3D design.
- Floral Arrangements & Centerpieces
- Flooring
- Backdrops
- Tabletop Items & Accents
What items am I NOT able to upload?
Merri uses specific 3D logic, geometry, and rendering to make items work the way they do in our program. Any items that require our team to create 3D properties for it to function are not permitted as user uploads, for example:
- Tables
- Chairs
- Tents & Tent Accessories
- Stages & Stage Accessories
- Tablecloths & Table Runners
- Pipe & Drape
If you select one of these categories in the Upload Item tool, like a tent, it will automatically change the "Upload Item" form into an "Item Request" form and you will see the following message:

How do I upload an item?
With Merri's photo editing technology, you are able to upload an image of your item, crop the image, and remove the background all from within our upload item modal.
1. Fill out the Upload Item Form
It's important to select the correct category, subcategory, and type as different items have different logic placed on them in 3D.
2. Obtain and Attach a clear image of your item
When uploading an image, it's important to use a high quality image so that the item will look its best in 3D. *If the image is blurry or angled, your item will be blurry and appear at an angle.

3. Crop the image
Once you attach your clear image, use our cropping tool to drag the outline as close to the image as possible, leaving the least amount of space around the item itself.
4. Remove the background from the image
In order for the item to look its best in 3D, you must make the background of the image transparent.
5. Click Finish
Once you click "Finish," your item will automatically appear in your Vision Board. You will always be able to find your uploaded items as the first items listed in their respective categories.
Now you're ready to use your item to create a unique, one-of-a-kind 3D design!
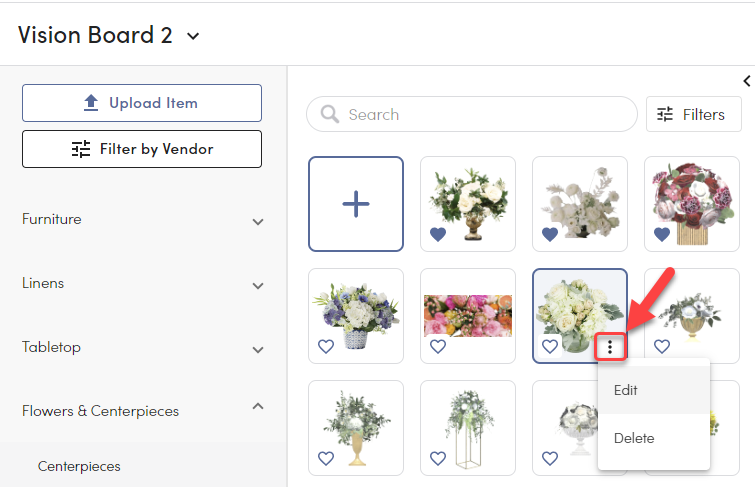
How do I edit or delete an uploaded item?
Hover over any of your uploaded items in the catalog and click the 3 dots to edit or delete the item.
NOTE:
All Venue Partners have access to this feature.
Only All Access Event Planners have access to this feature.