There are two ways to add chandeliers to a tent: in the Tent Designer or individually from the Ceiling & Décor section.
Adding a Chandelier to your Vision Board
We recommend adding any chandelier(s) you'd like to use in 3D to your Vision Board before entering your 3D design. You will find the entire catalog of chandeliers in Lighting -> Chandeliers.

How To Add Chandeliers to a Tent
Adding a Chandelier in the Tent Designer
Using the Tent Designer is the most common way to add a chandelier (and any other tent accessories) as all items will become part of a "set" that moves together. The chandelier height is automatically determined and the placement options, other than the ones provided, are not able to be changed.
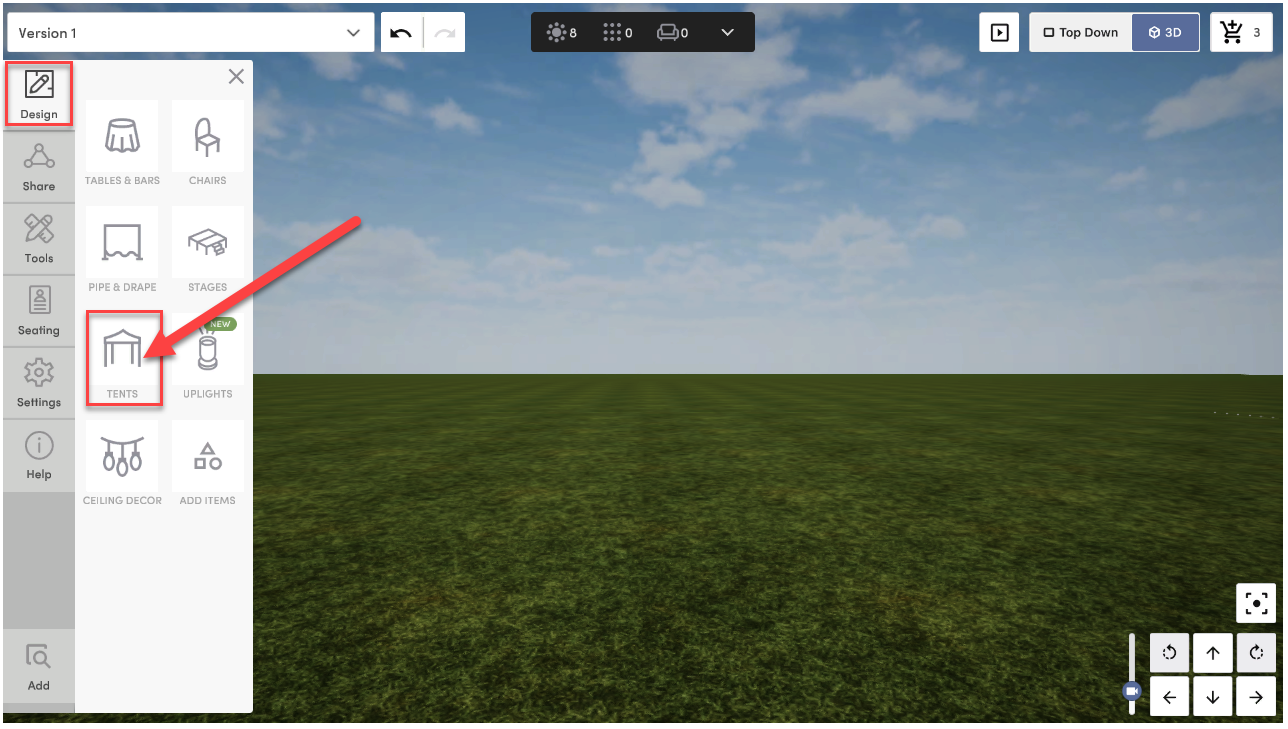
- In 3D, click into the Design Tab > Click Tents
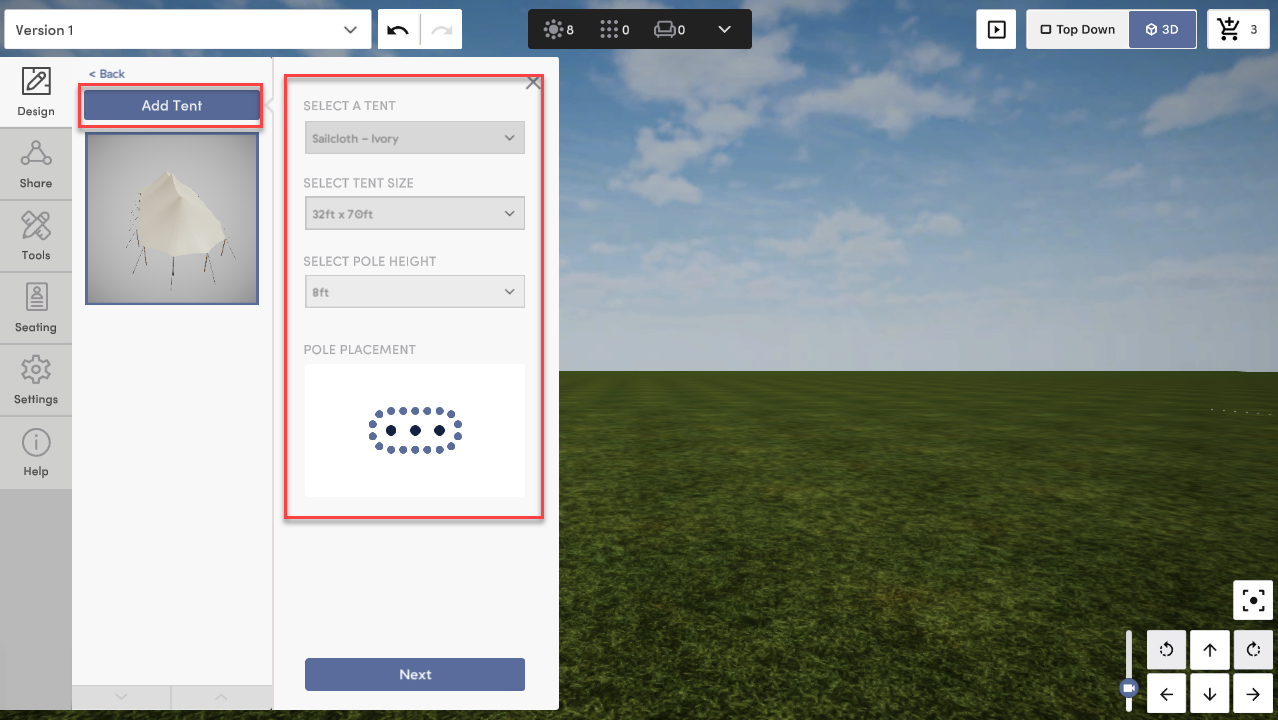
- Click "Add Tent" to select the tent size, pole height, and in permitted tents, pole placement > Click Next
- Design your tent > Click "Chandelier 1" or "Chandelier 2"

- Choose one of the chandeliers you added to your Vision Board and choose the placement
* You can click "Browse" to add a chandelier if you did not add one to your Vision Board

Adding a Chandelier to a Tent Individually
You may want to skip adding a chandelier in the Tent Designer and add one individually if you need one in specific locations not provided by the Tent Designer. To do this, you will add a chandelier from the Ceiling Décor section and use the "Change Height" tool.
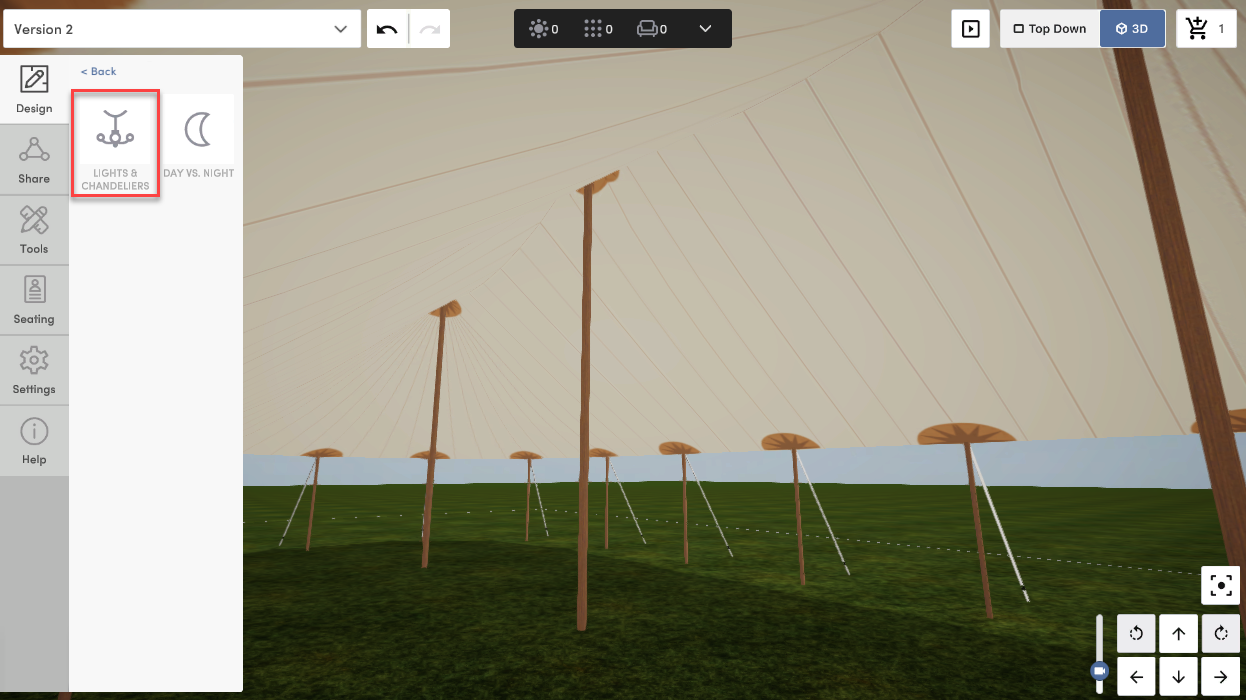
- In 3D, after you've placed your tent, Click into the Design Tab > Click Ceiling Décor
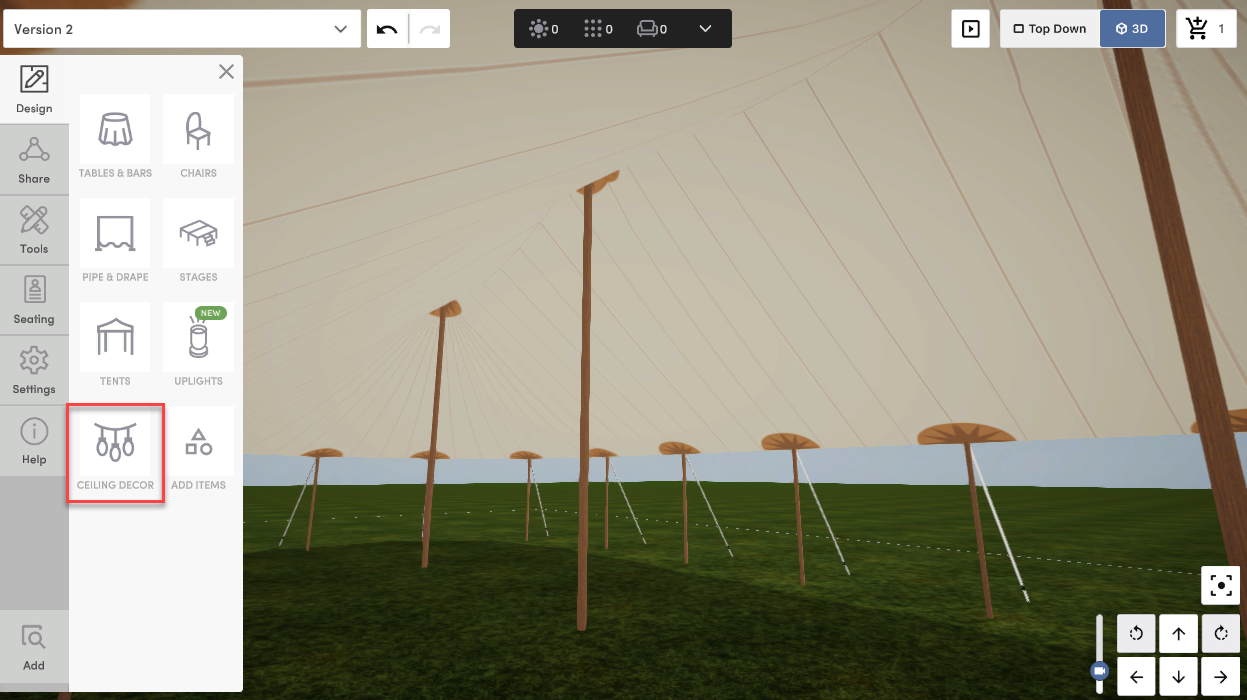
- Click Lights & Chandeliers
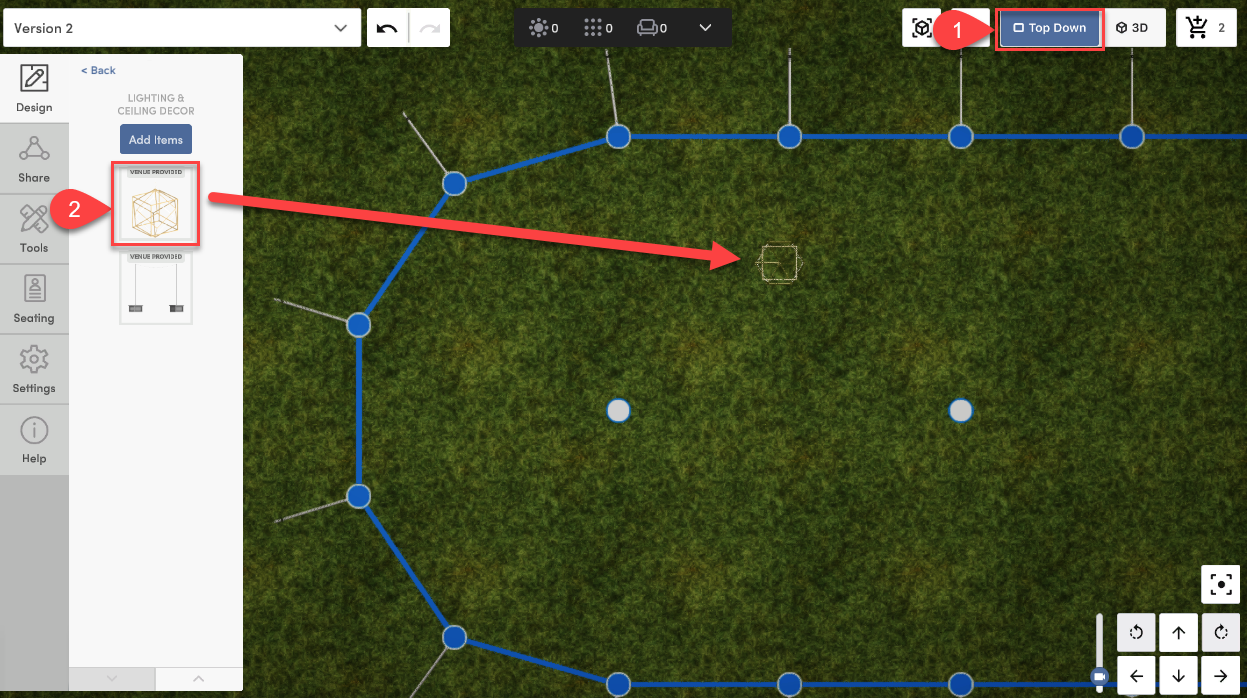
- Go into "Top Down" view and Drag and Drop your chandelier into place
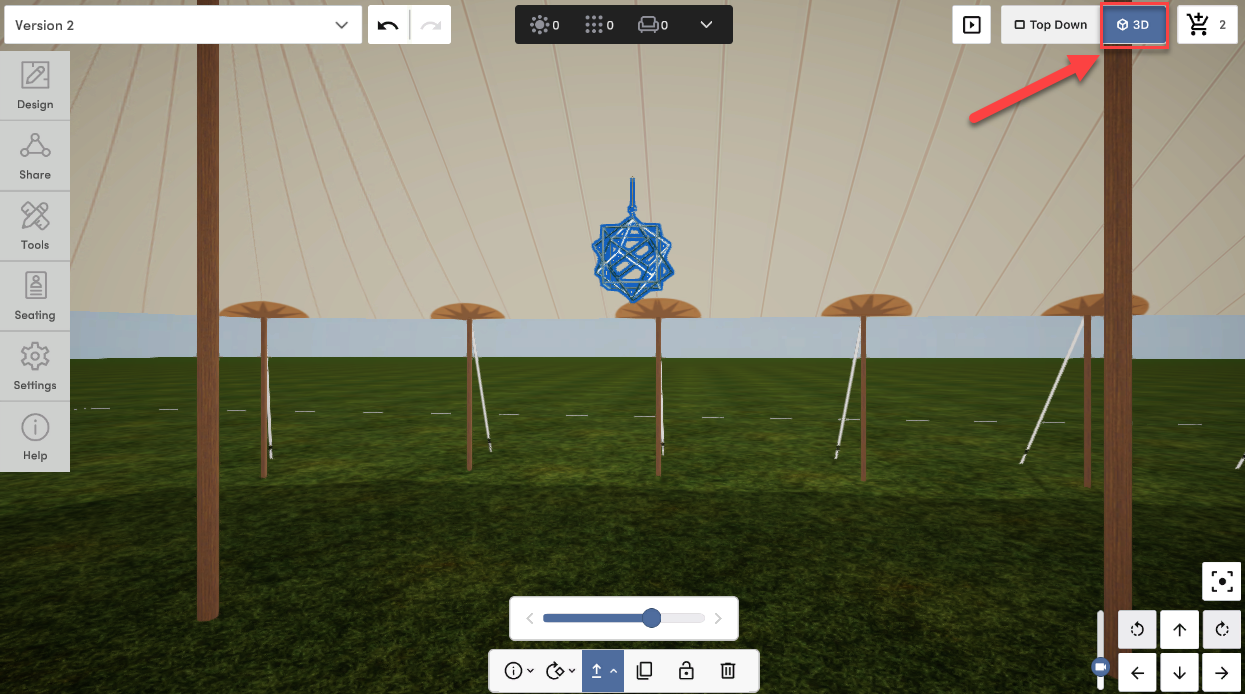
- Select the Chandelier and Click the "Change Height" tool in the menu at the bottom of the screen to lower the chandelier into the tent
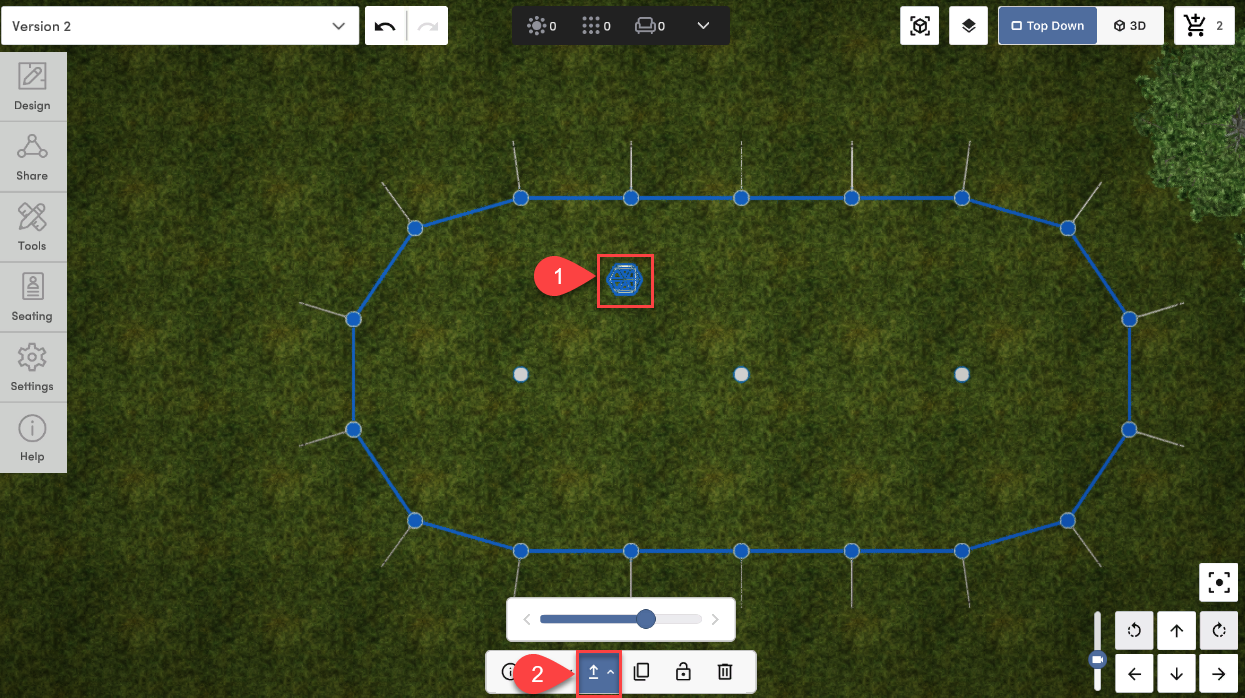
- While the chandelier is still selected, click back into 3D view and continue to adjust the height as needed