Merri's stage tool allows for easy stage design & customization.
Here is a 2 minute video on using the Stage Tool!
Where To Find Stages
You can either add a stage to your Vision Board first, or directly from within your 3D Design.
Vision Board
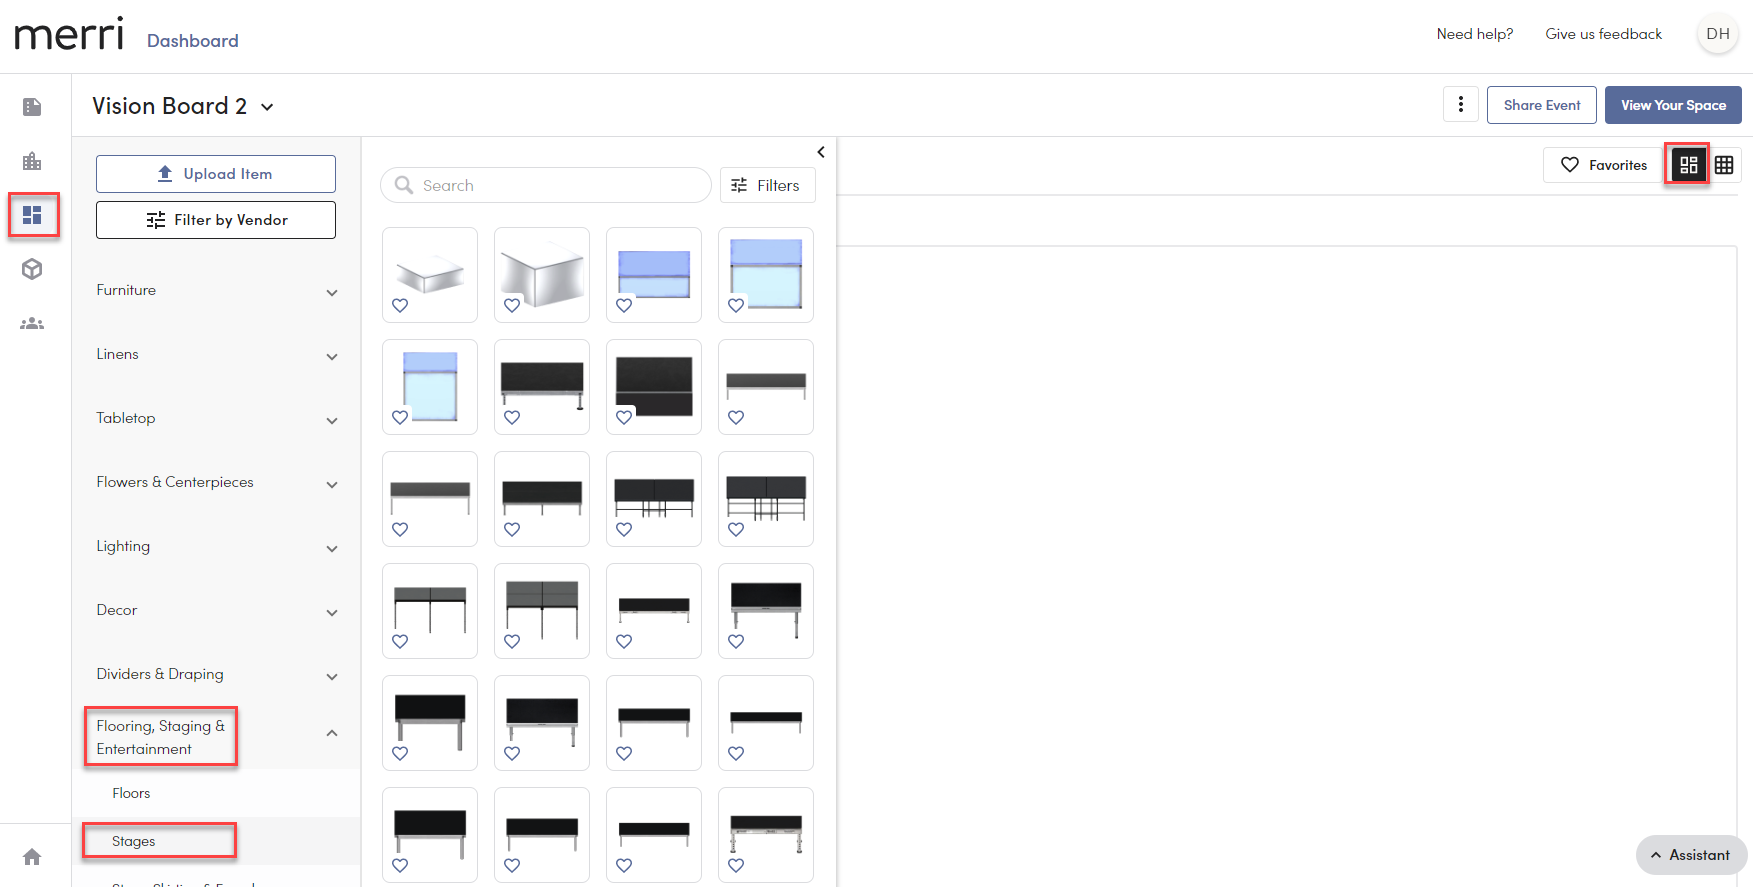
You will find all of the stage options in our Merri catalog on your Vision Board.
- Freeform View by choosing "Flooring, Staging, & Entertainment" -> "Stages"
- Category View in "Entertainment" -> "Staging"
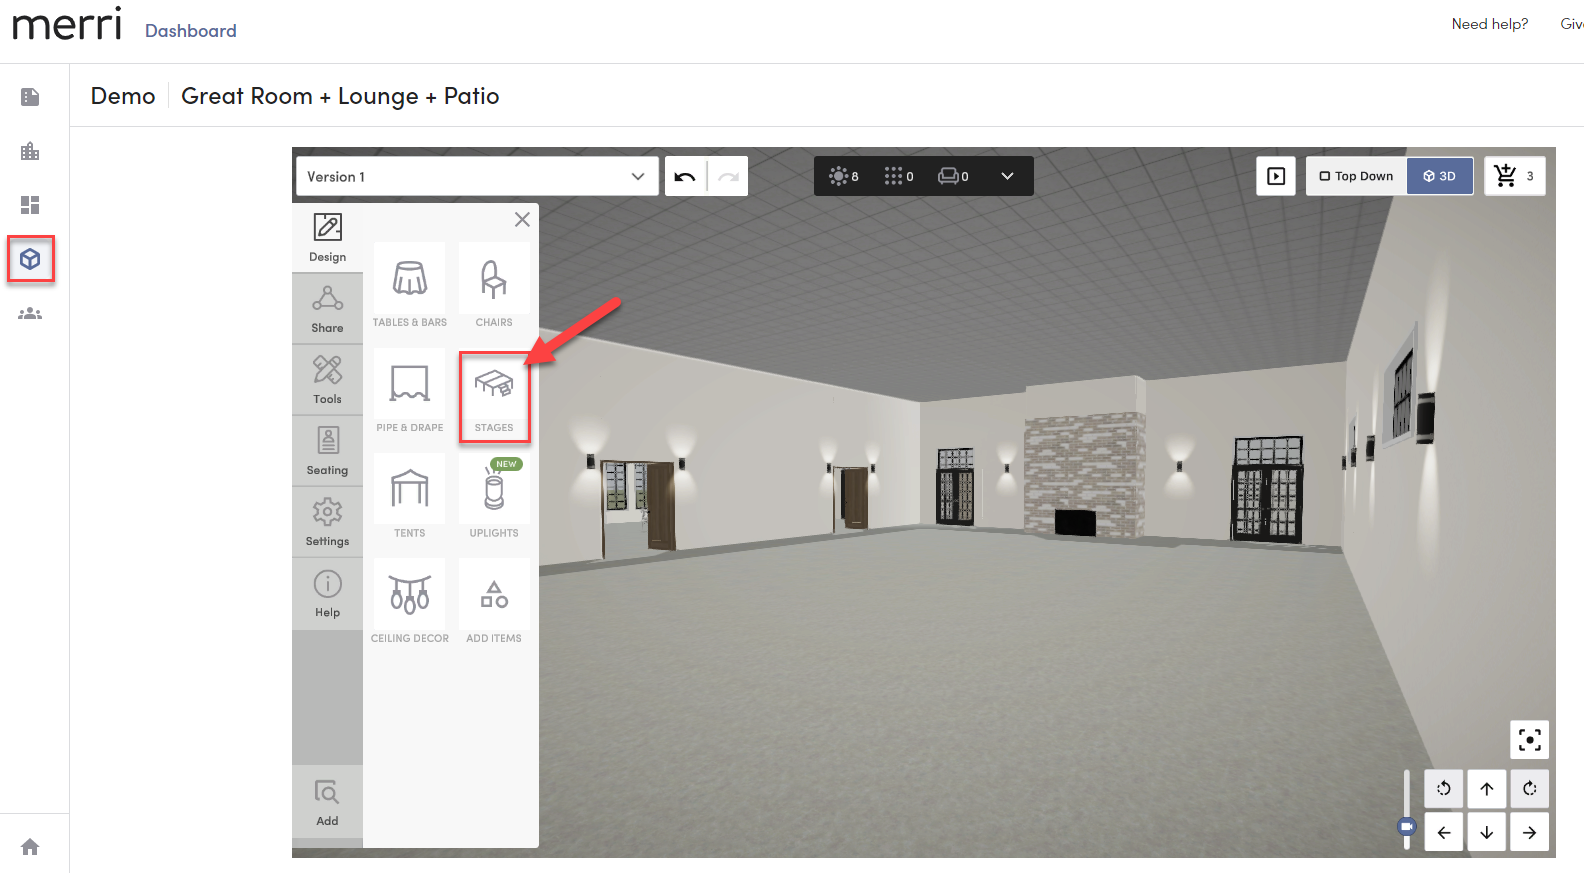
3D Design
Customizing Your Stage
Changing The Stage Size
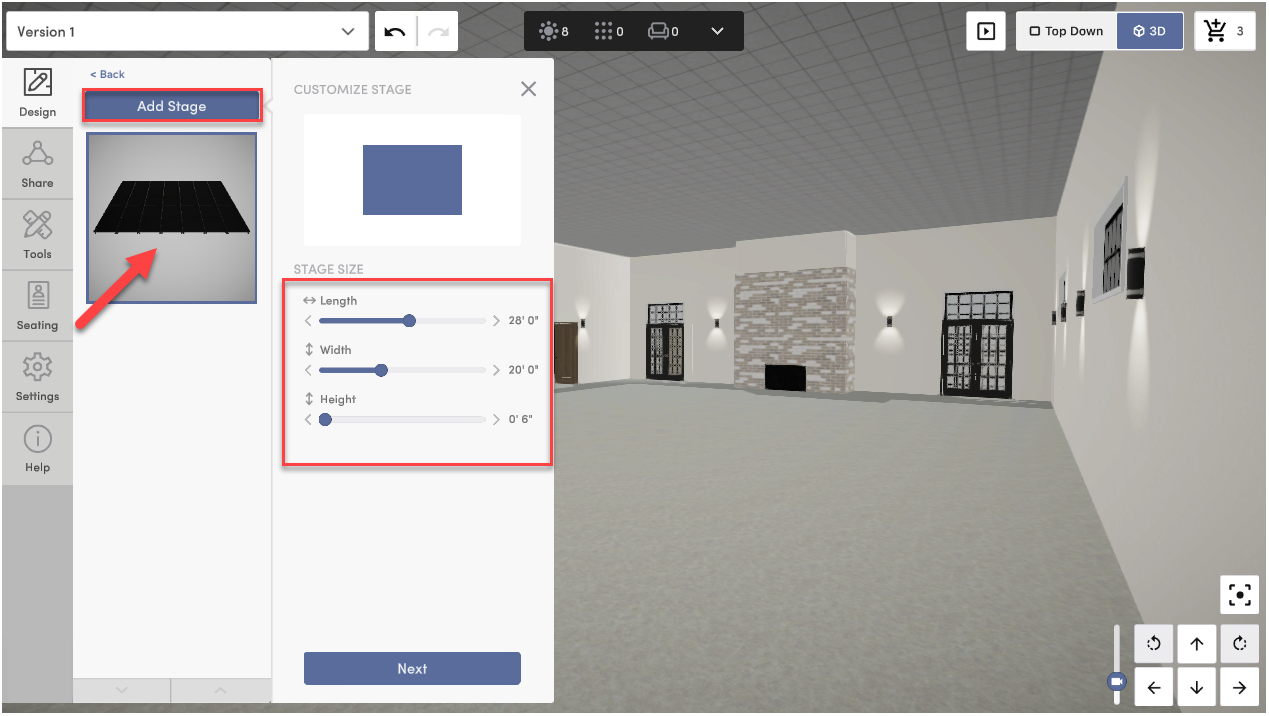
When you add a stage, you'll see that we allow you to use sliders to configure the size of your stage across all three dimensions i.e. length, width, and height.
The size of the increments that you're using are dependent upon the stage block that you have selected. For example, if you choose a 4'x8' stage block, the increments in length and width will go up or down in increments of 4 or 8 feet. If you choose a 3'x3' stage block, the measurements will adjust in multiples of 3, and so on.
Height will always adjust in increments of 6".
Designing Your Stage
When you are finished sizing your stage, you will hit "Next" and move on to the stage design. From there, you can select a façade, stairs, and railing. 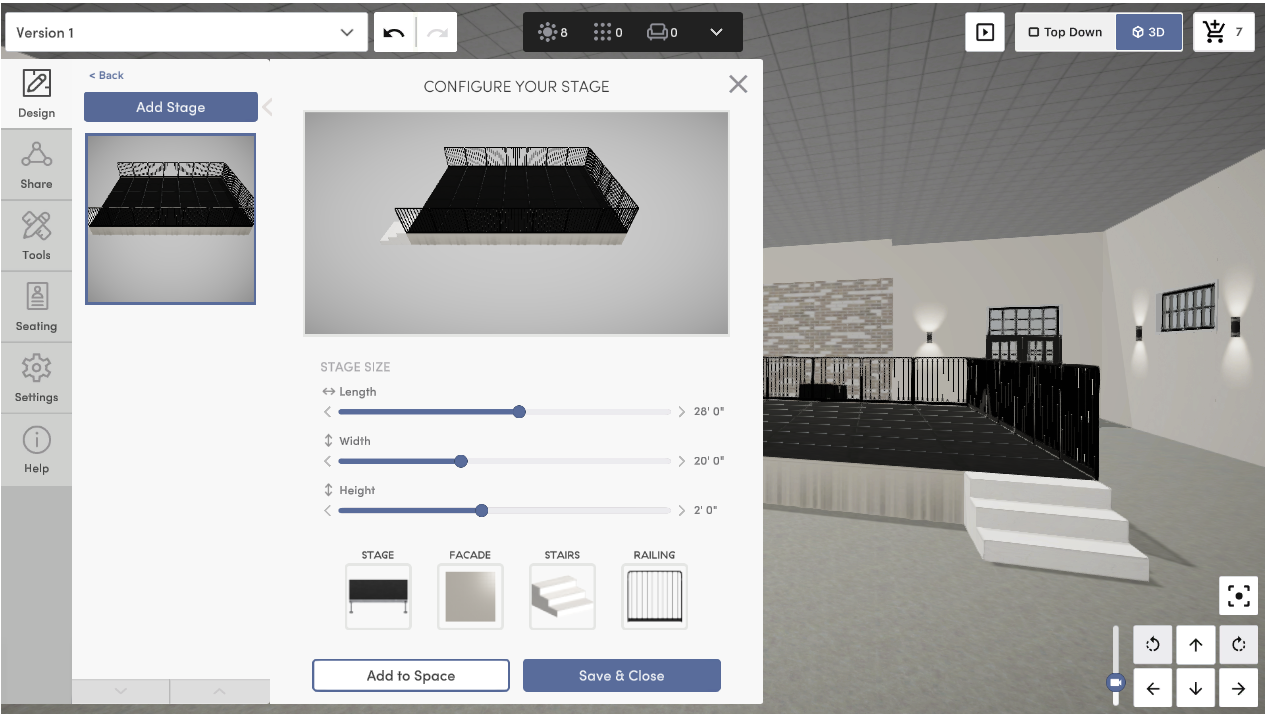
Choosing a Facade
Your stage's facade can either be a stage skirt, where you can then choose ripples or a straight wrap, or a built facade. If you choose a skirt, it will automatically adjust to the height of the stage.

Once you're finished designing your stage, you can select "Add to Space" or "Save & Close" to drag and drop it into your design.
Pro Tip 😊: Go into "Top Down" view at the top right of your screen to accurately position your stage within your floorplan.
*Note, if you ever need a round or triangle stage, those will still be in "Add Items".