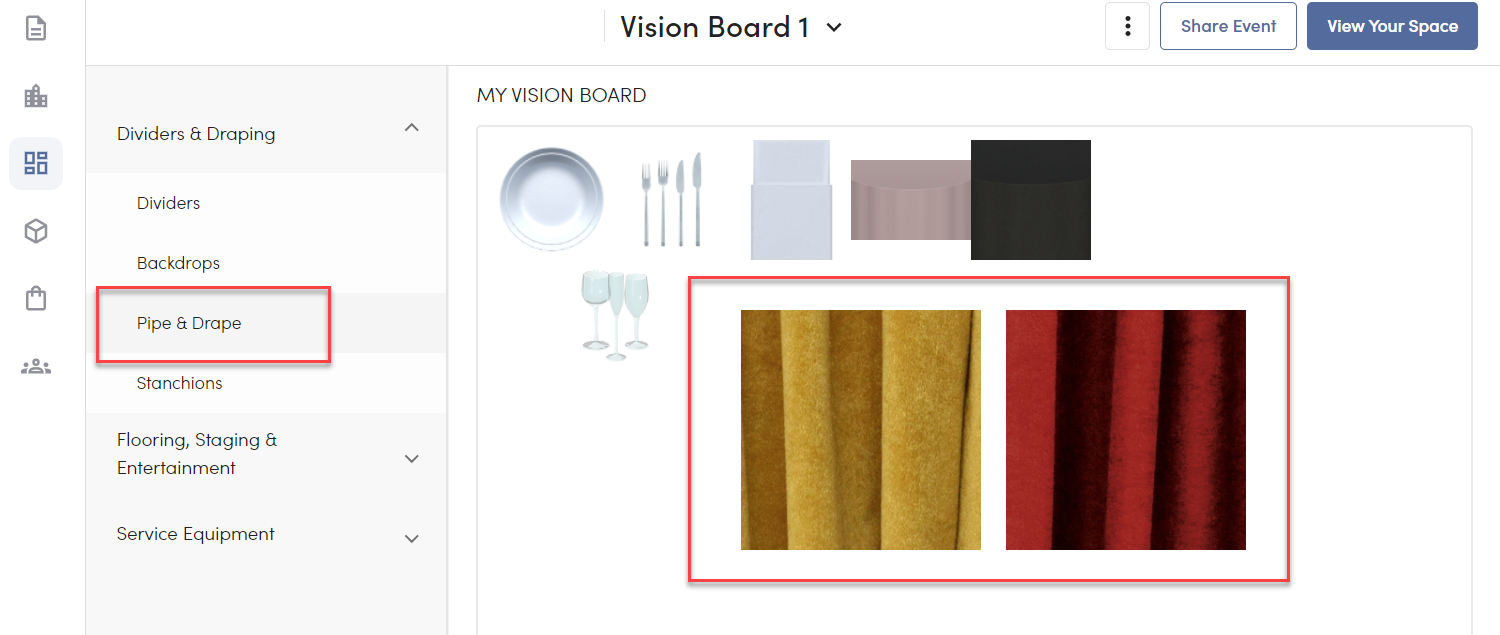
1. Select the drape color & material on the Vision Board page
Don't worry about silhouette, length or width quite yet. This is located under Dividers & Draping: Pipe & Drape.
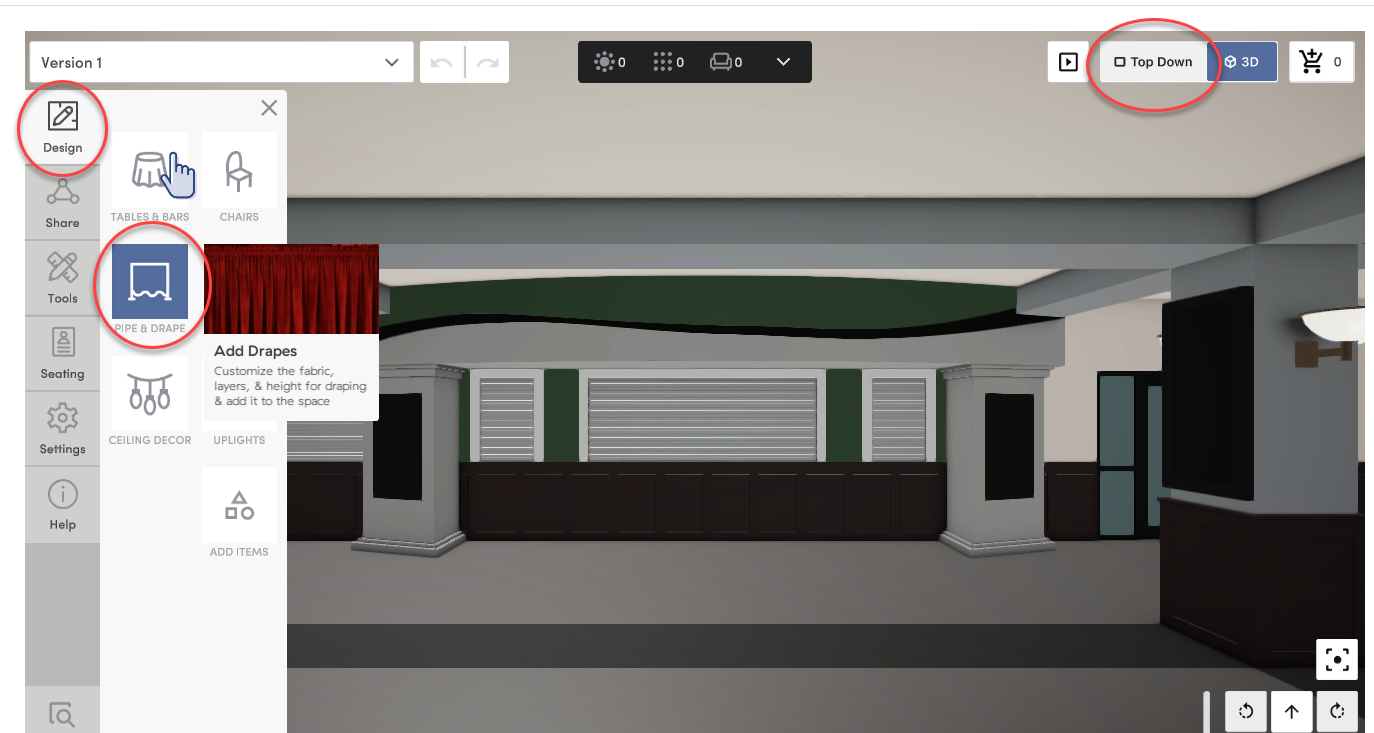
2. Enter 3D Design Mode
Hop into 3D Design mode via the View Your Space button at the top right.
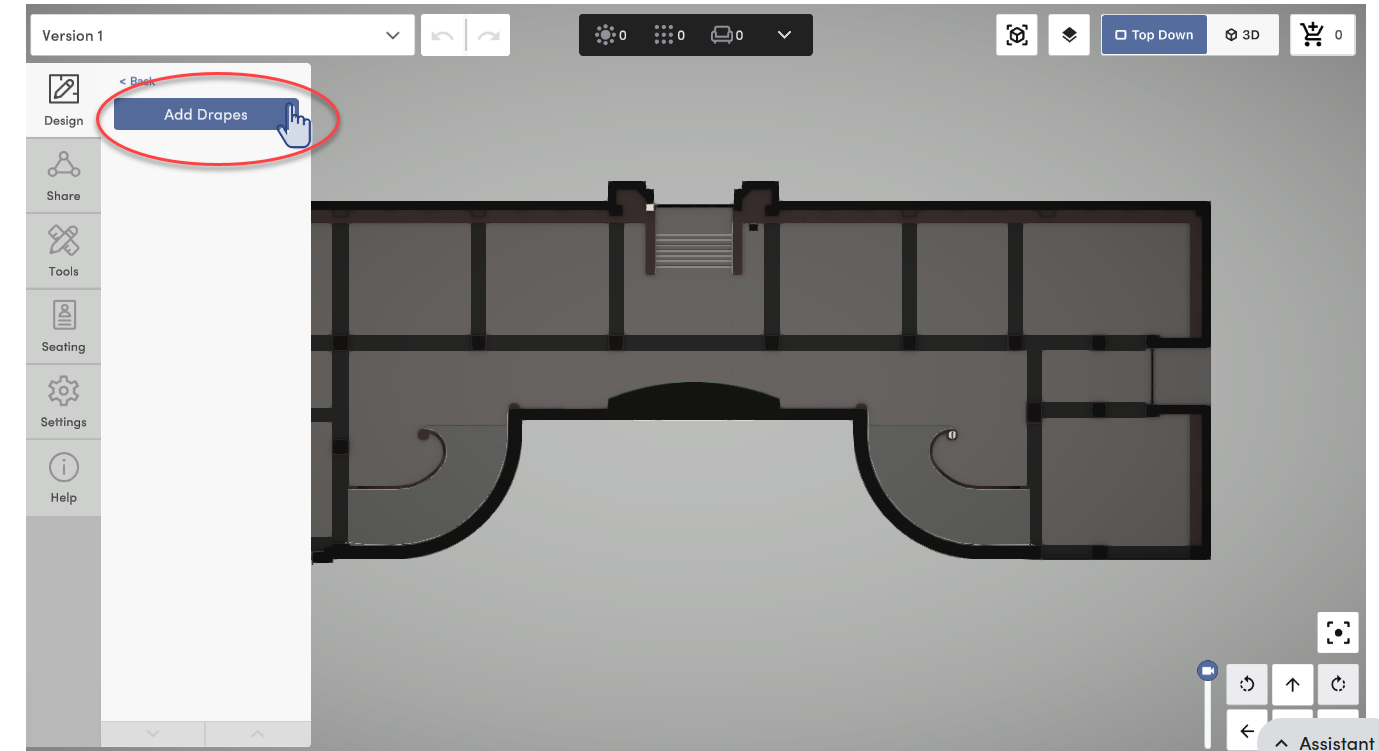
3. In the Design panel, using the Pipe & Drape tool, you can "add drapes"
It is recommended to go into Top Down mode before adding your pipe & drape.
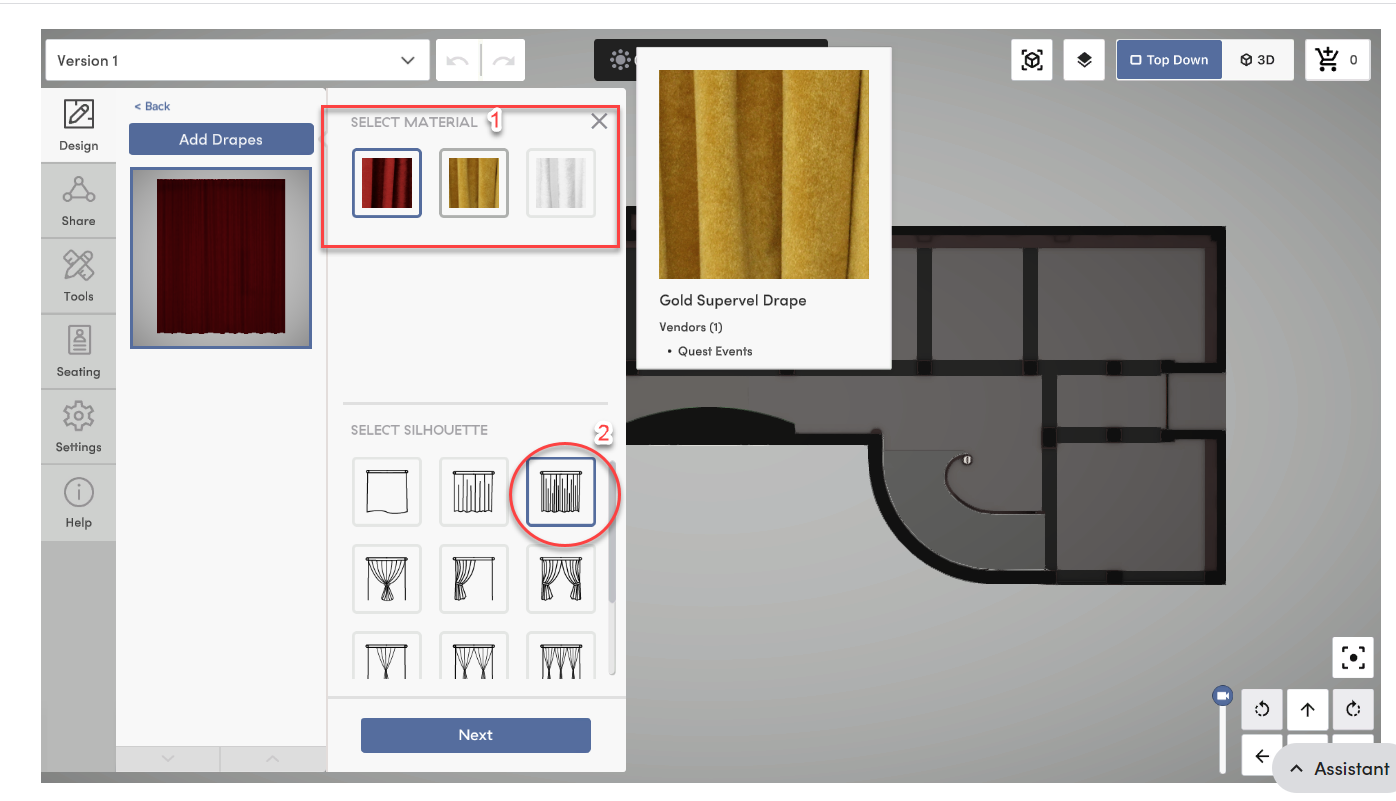
- Select the color/material > Select the silhouette > Click Next.
- Adjust the height here if needed by dragging the blue dot or using the arrows to the right or left (can also be adjusted in 3D mode via the bottom menu)
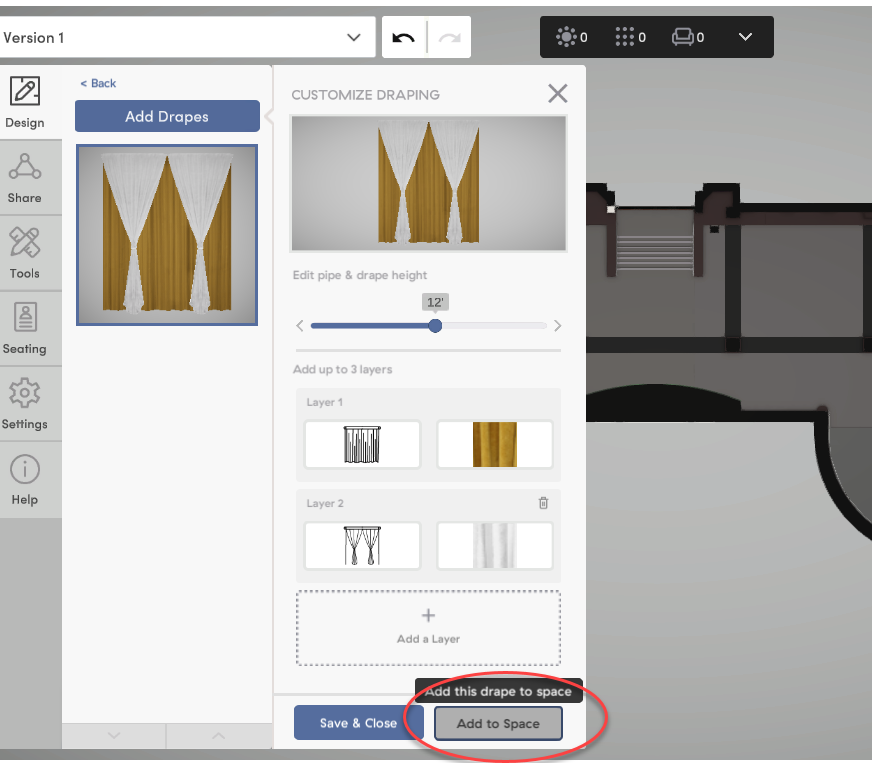
- Add another layer if needed.
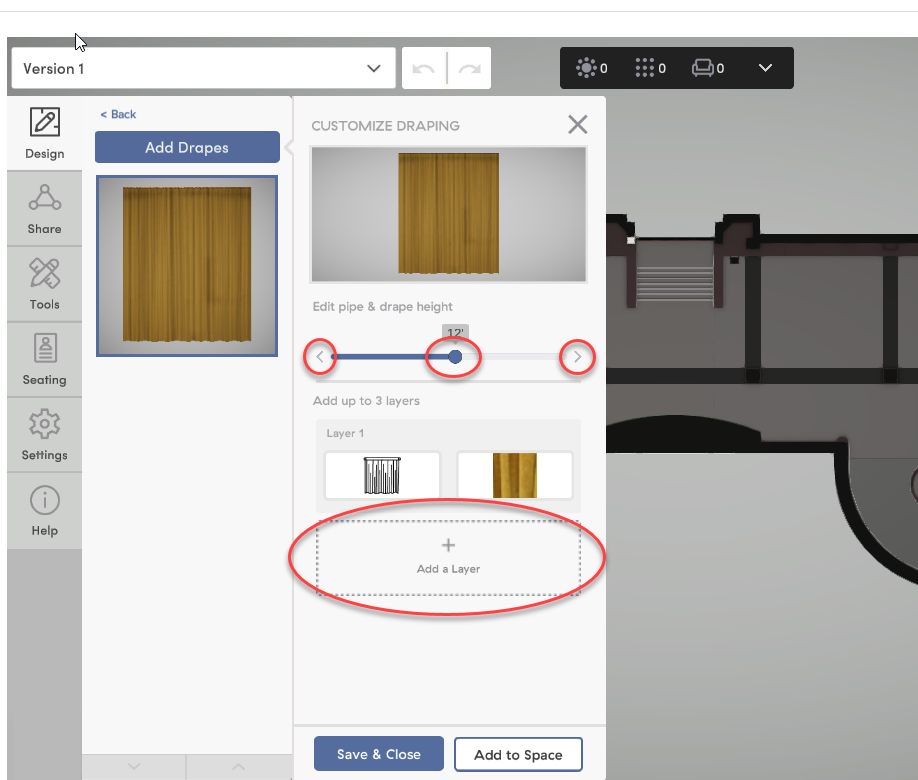
- If adding another layer, you will be able to select a material & silhouette for this layer as well. Once you are finished, you can click "Add to Space"
- Once this run of Pipe & Drape is added, you can then use the blue dots to drag out each end to a desired length.
- To view your Pipe & Drape as part of your design, you can hop into 3D!
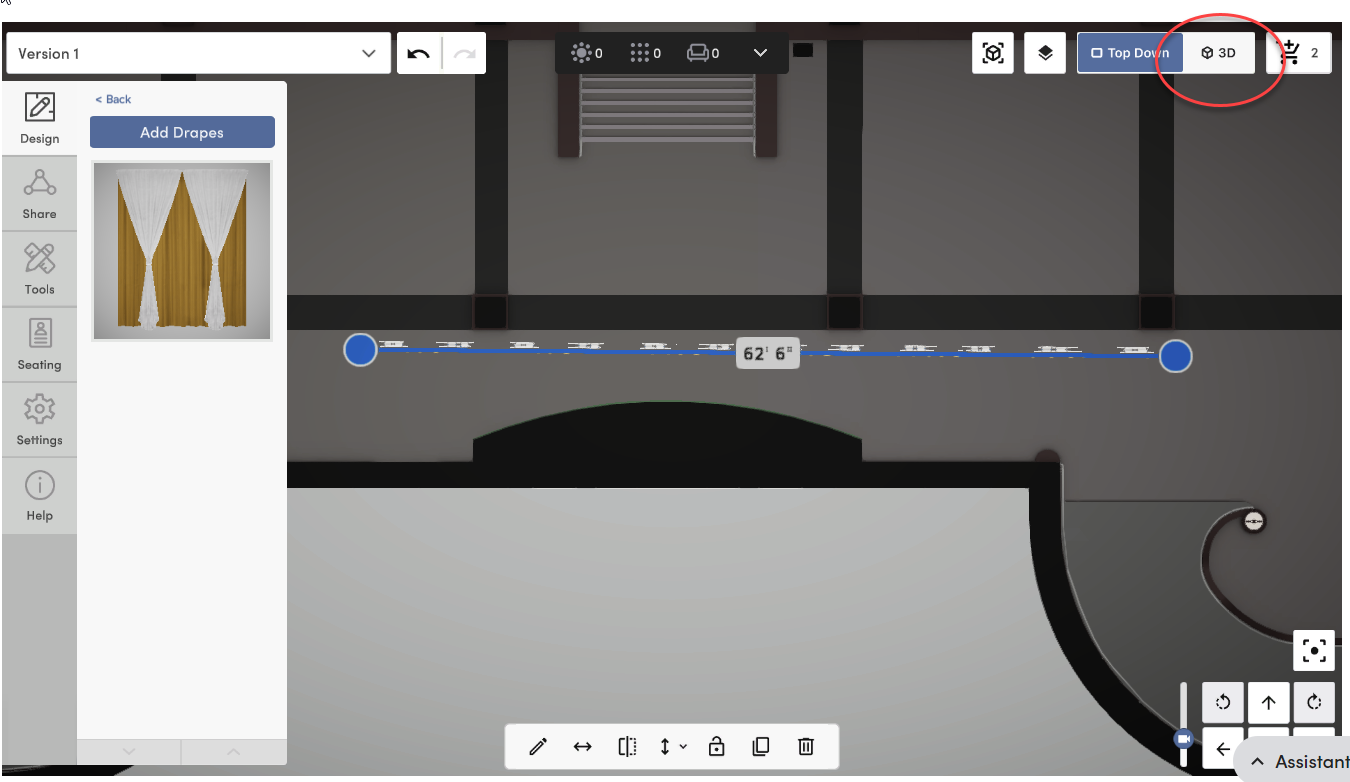
- With your Pipe & Drape selected, you can use the bottom menu to adjust height, flip the layers, lock into place or delete. You can also choose to adjust the width & we will take you back to Top Down mode.
Quick Video: